


Best Bushcraft Coffee Methods
Instant Coffee


Let's start with the less than glamorous but sometimes necessary instant coffee. We won't spend a lot of time on the steps. Make the water hot, dump in the instant coffee, stir and enjoy.
However, there is a wide variety of instant coffee available on the market. From the classic grocery store brands to instant options from the big chain coffee shops, you just have to find what works for you.
You might be surprised that the most convenient version of coffee is over 100 hundred years old. It was first created and patented in New Zealand in 1890.
While it's easy to discount instant coffee, there's surely an option that suits your taste. If you still doubt it, you should check out how much of the world looks to instant coffee as their preferred method.
Percolator

Another great option for brewing camp coffee is the venerable percolator. If you're not familiar, once water is boiling in the percolator, it is forced up a hollow pump tube. When it reaches the top, the spreader cover ensures it's sprayed evenly over the coffee grounds.
This process makes a strong full-flavored cup of coffee. However, if you aren't careful, you can overheat, aka burn, the coffee, and it will have an extra bitter flavor.
Percolators come in all shapes and sizes. Depending on the stove you plan to use as a heat source, you can provide coffee for a couple of people or a large group.
Aeropress

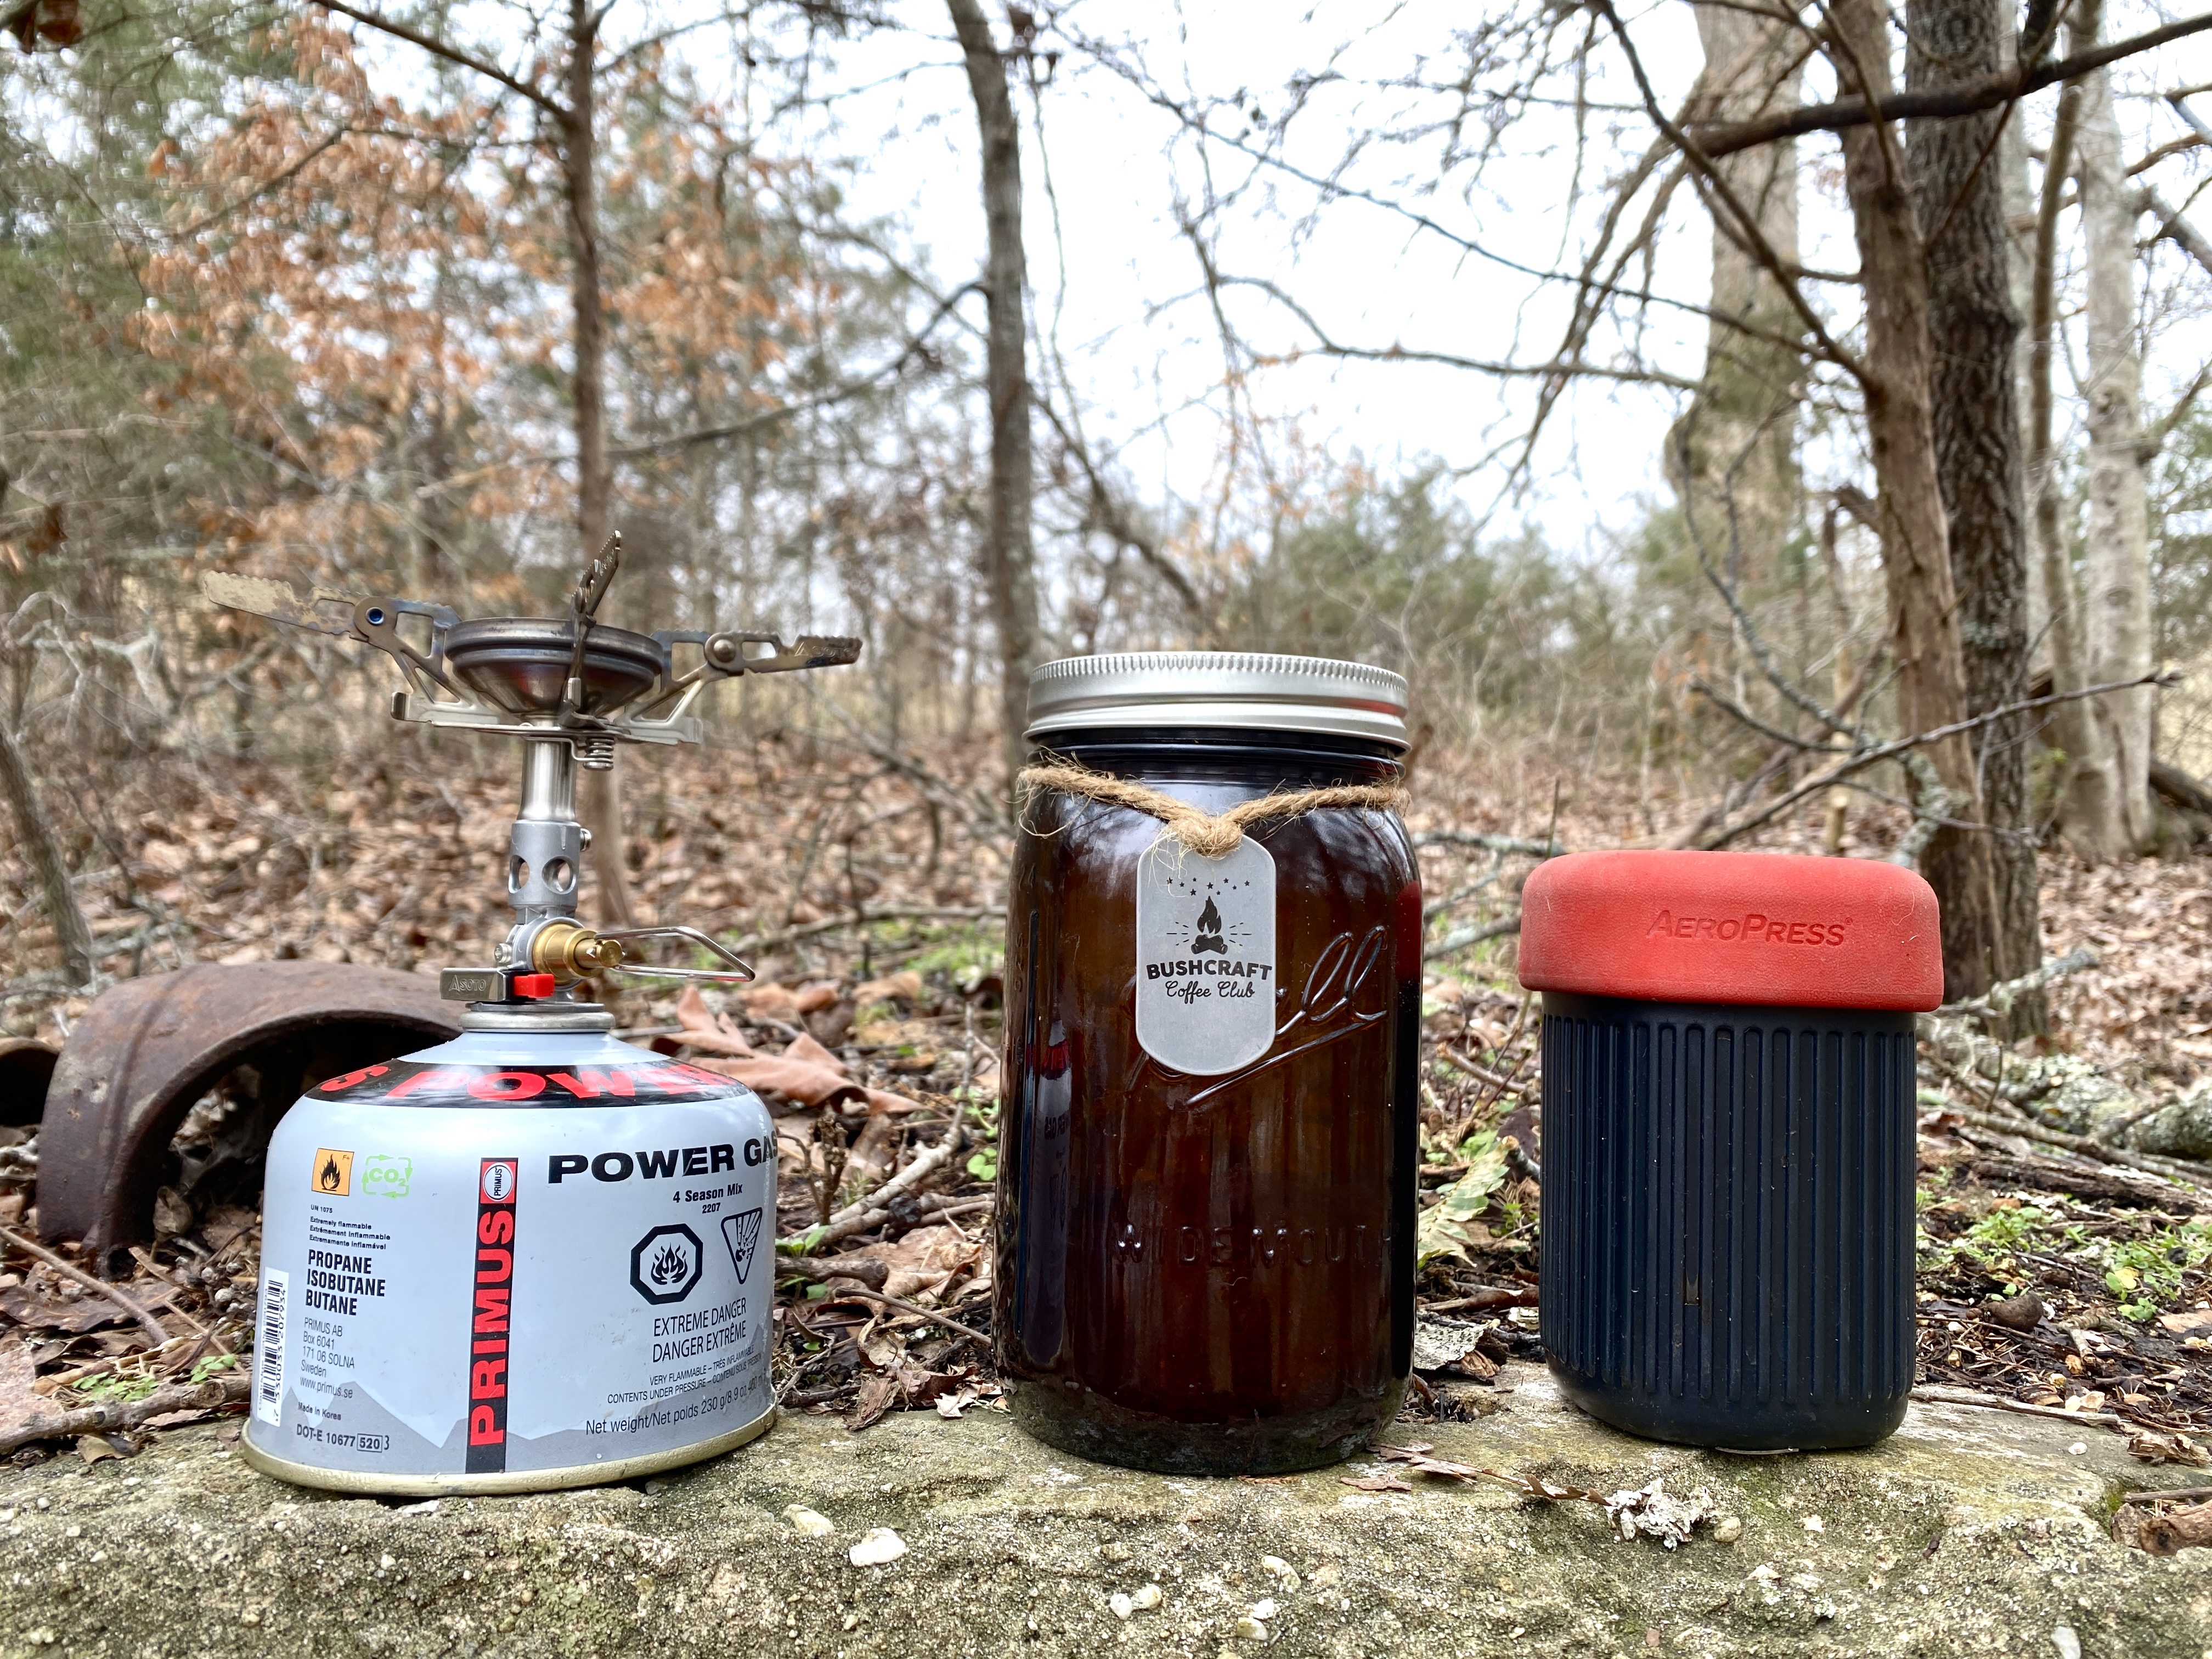
The Aeropress is a relatively recent newcomer to the coffee maker scene. Officially debuting in 2005, the Aeropress has quickly gained favor with coffee aficionados.
The kit consists of a polypropylene tub, a silicone capped plunger that fits inside, and a filter cap that screws onto the end.
After adding grounds and hot water, the Aeropress only takes about 30 seconds to brew. It can be pressed right into your favorite camp mug.
Aeropress brewed coffee is known for having a low level of acidity and a full flavor comparable to espresso. Plus, you can use it with your favorite brand of coffee. Just make sure it's finely ground to take advantage of this brewing style.
Mors Kochanski's Method for Bush Coffee


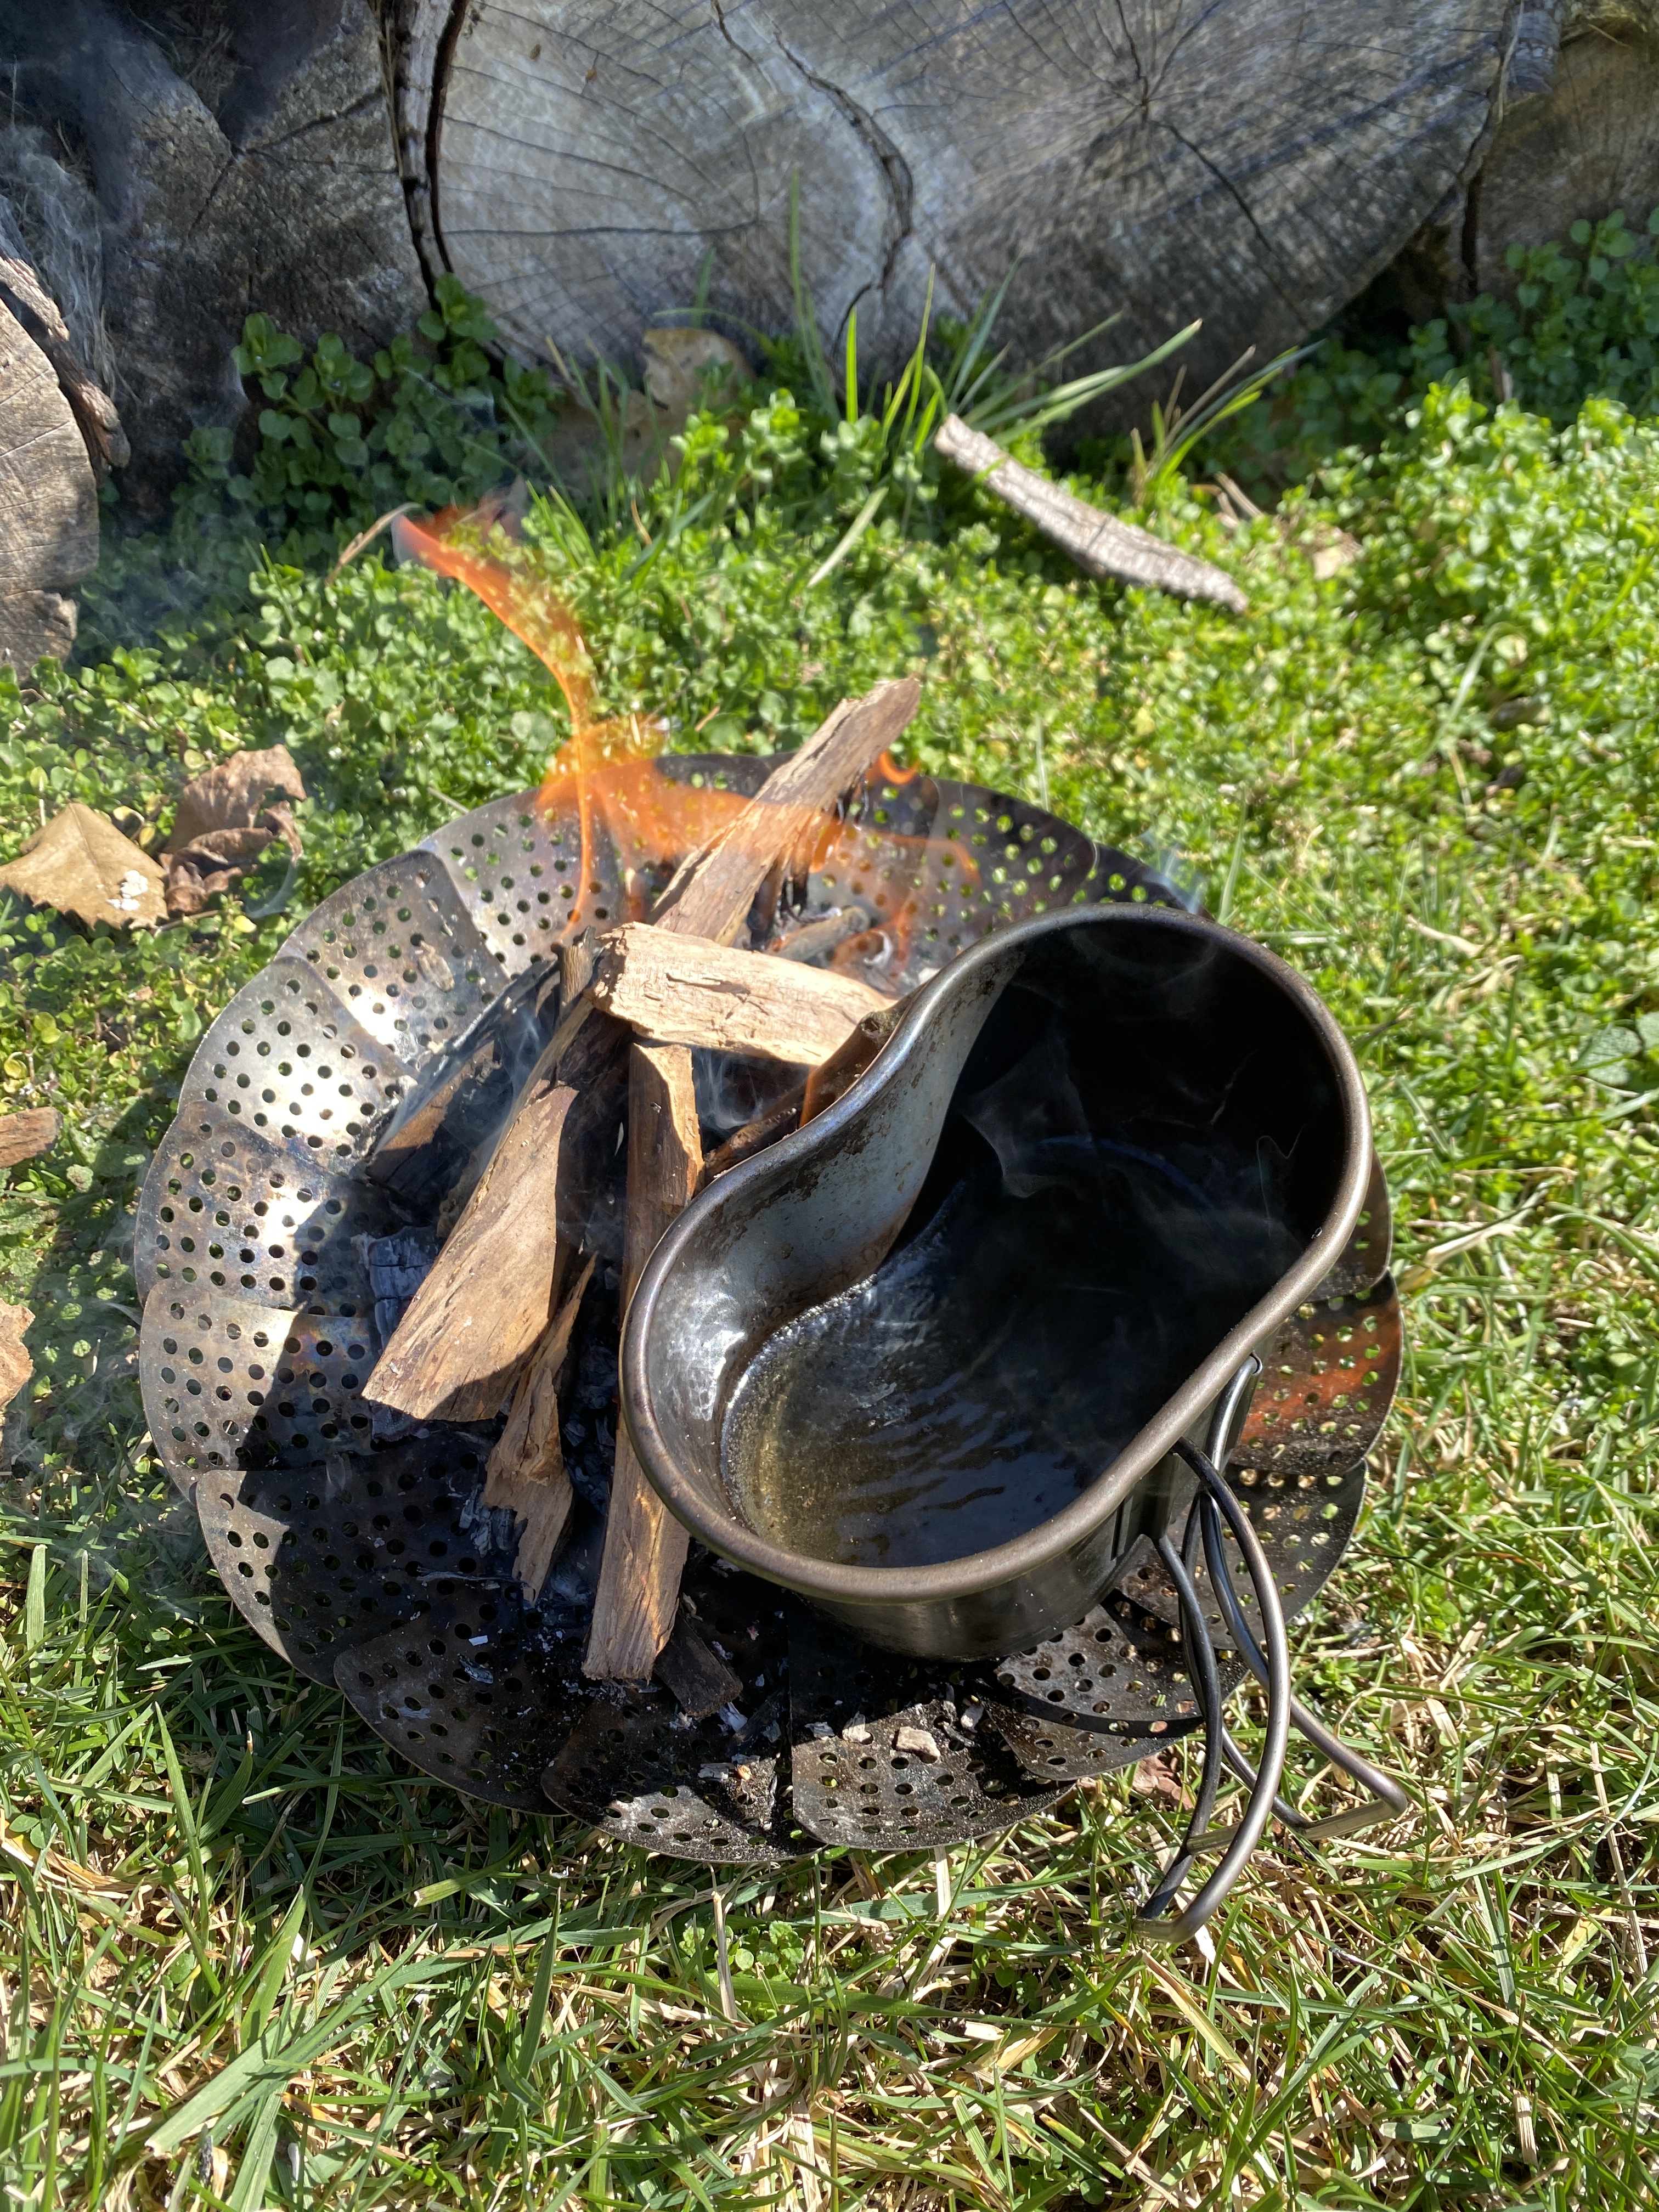
If you are looking for a no-frills method for making that delicious beverage that so many of us require to start our day, then bush coffee is the answer you seek. Bush coffee requires no filters or special apparatus other than items that we should already be carrying in our kit. Your stainless steel water bottle, nesting cup, coffee, and water will suffice for your personal coffee needs. However, if you are making coffee for two or more people, you will need a good bush pot.
Whether you are using an open fire or a stove, the method pretty much remains the same. The 1st step is adding the water to the vessel you are going to use to make the coffee. I usually fill my container about 1/3 of the way with water, and then I add one tablespoon of ground coffee for every eight ounces of coffee, and I let the grounds rest on top of the water, so there's no need to stir. The great thing about this method is that you can adjust the strength of the coffee as you see fit. Mors always said, "you can make strong coffee weak, but you can't make weak coffee strong."
If you are using open fire, you will need some sort of adjustable suspension system, like a tripod, for example.
You want to bring the water to a boil slowly and let the grounds incorporate themselves into the water gradually. Once you start to see bubbles forming on the side of the pot, you have to pay close attention to the process at this point. Coffee beans contain carbon dioxide, and this mixed with the oxygen in the water will cause a foaming reaction. When you start to see the foaming, you want to lower the heat by turning down the stove or lifting the pot from the flame. At this point, the grounds should be incorporated into the water, and the liquid will be boiling. Let the coffee boil for about one minute and no longer than 90 seconds or the coffee becomes bitter and less enjoyable.
After boiling for about 1 minute, remove the pot from the flame and let the coffee rest for about 15 seconds, and then add a few splashes of cold water from a height of about 1 foot from the top of the pot. This shocks (also known as frocking) the grounds and allows them to settle to the bottom of the pot. You can also tap the side of the pot with a stick to further help the settling process. At this point, you can either pour the coffee straight from the vessel into your water bottle or use a dipping cup to dispense the beverage to others. You can now add additional water to weaken and add accouterments to your taste.
I find that this method makes the tastiest cup of coffee and provides the highest concentrated levels of caffeine due to the constant and direct contact of the grounds with water as it comes to a boil. When you need a strong cup of coffee